Desinfec’t, formerly known as Knoppicillin, is a Ubuntu-based Linux distribution that was created by the c’t Magazine for Computer Technology. It contains several anti-virus engines (currently ESET, F-Secure, Kaspersky and Sophos), as well as several tools for recovering systems from malware incidents.
Some time ago, a colleague and I were called to a ransomware incident. Despite clarifying how the malware got into the network, we were asked to support with containment and rebuilding the infrastructure from scratch. The customer themselves already had purchased a copy of Desinfec’t, in order to scan their systems. But since the signatures had already been “a few days old” and Desinfec’t being a live Linux, each system scan was heavily delayed by an initial update. For bare-metal systems, it is possible to generate a bootable thumb-drive with a persistence partition that will keep the updates. But for virtualized servers this isn’t an option. The customer had also disconnect everything from their main router and internet connection, so only a 16MBit/s backup internet connection was available. And with more systems being scanned in parallel, the connection was clogged in no time.

At that point, I suggested generating a new live ISO from the existing one that would also contain the latest signatures. The customer agreed, and after a few hours a fresh ISO with up-to-date signatures was ready to be used on many physical and virtual systems, without a need for internet connectivity. This blog post is meant to mainly be a brain-dump, so I don’t have to search the whole internet about it. The general approach is applicable to all Ubuntu-based distributions, and can be adapted to other distributions’ Linux live disks too.
After booting the ISO image, open a terminal window and start the signature update via sudo /opt/desinfect/update_all_signatures.sh:
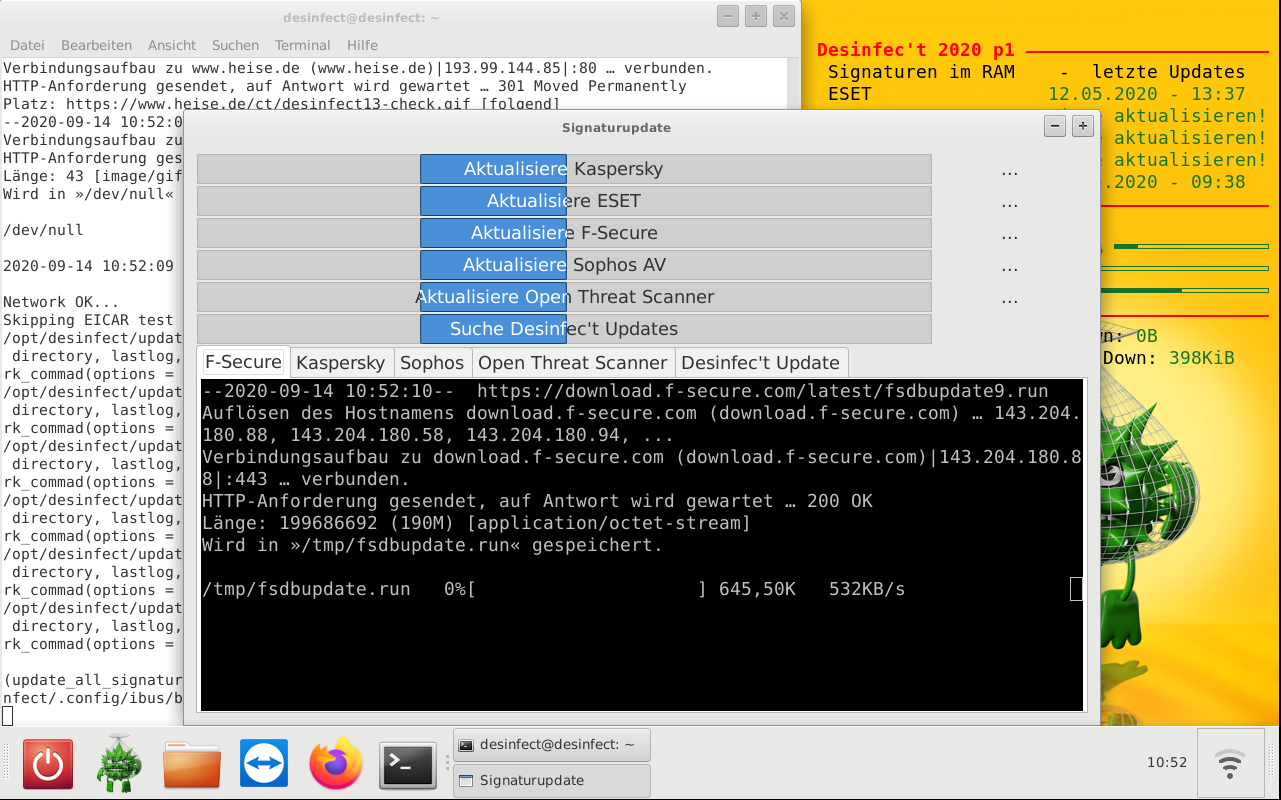
Depending on the actual internet connection, this might take some time, and in case of Kaspersky might even fail (don’t ask me why, but I see it regularly that even the official Kaspersky live disk fails to update):

Once the live system is up to date, it’s time to extract the ISO to a temporary location. Ideally, this should be on a dedicated ext4 partition (I used a fresh VM with an empty virtual disk for that purpose). In order to preserve file permissions and ownerships of the files, it is advised to sudo rsync the ISO/cdrom content. The filesystem.squashfs (containing the live system’s filesystem) should be excluded from rsync, since it will be replaced with an updated version, anyways. Instead, the squashfs will be extracted to another folder inside the working directory:
mkdir desinfect
sudo mount /dev/sda1 desinfect
cd desinfect
sudo mkdir extract
sudo rsync --exclude=/casper/filesystem.squashfs -a /media/cdrom/ extract
sudo unsquashfs /media/cdrom/casper/filesystem.squashfs
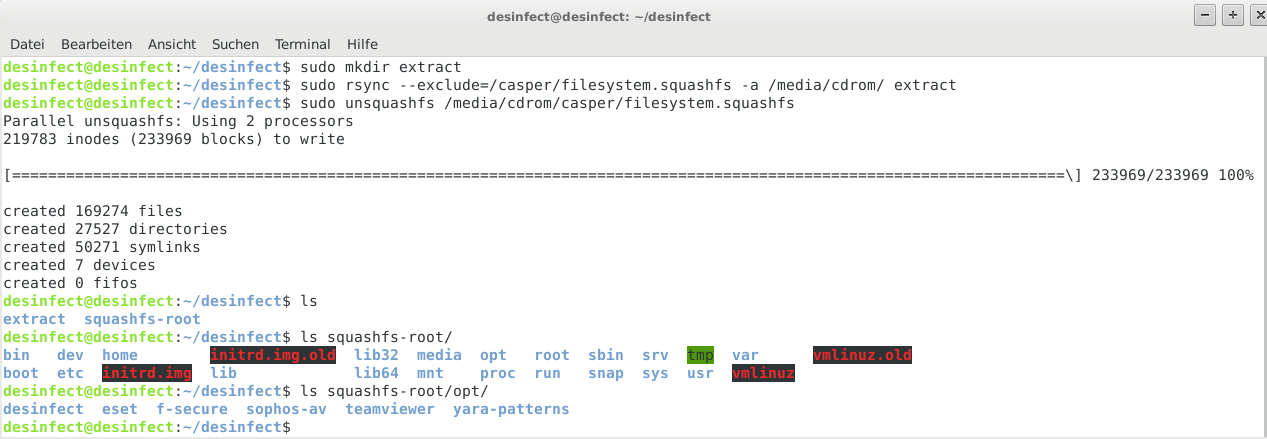
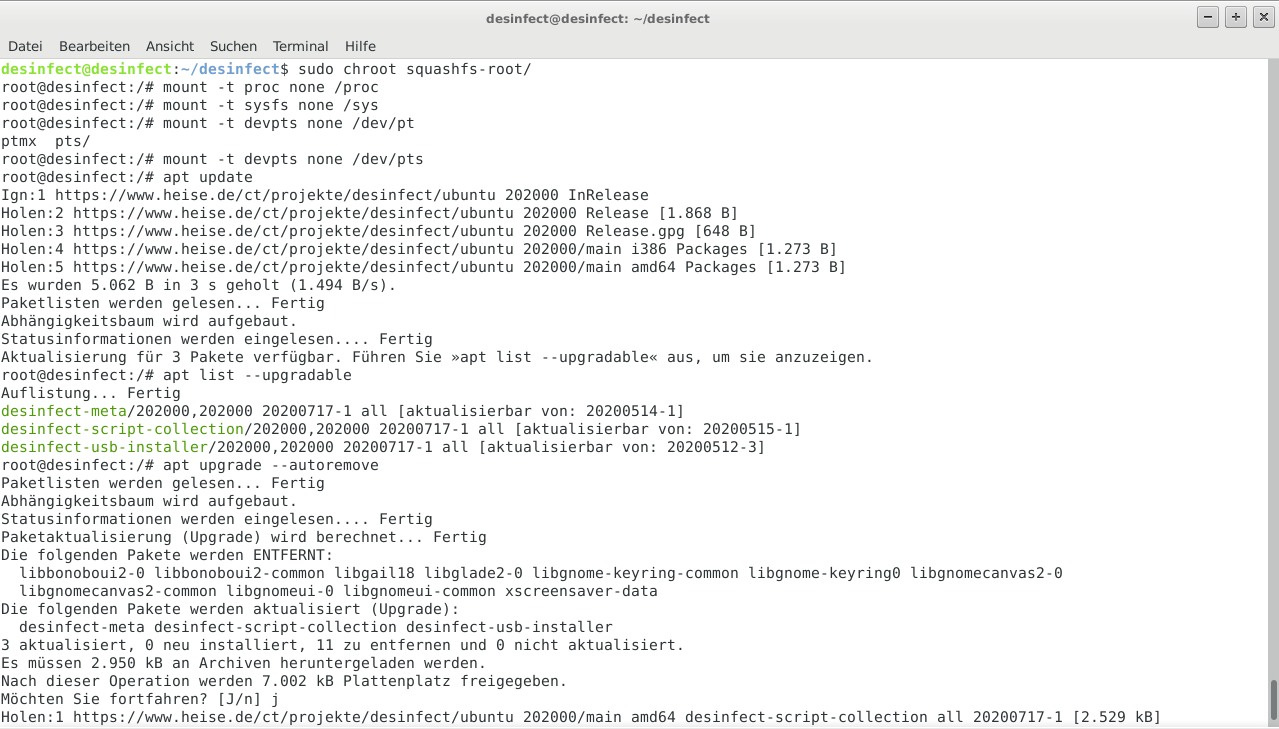
It is now possible to chroot into the extracted squashfs folder for updating installed or installing new packages (for older Desinfec’t releases, this could be used to install Yara, which is only part of the system since the 2020 release):
sudo cp /etc/resolv.conf squashfs-root/etc/
sudo mount --bind /dev/ squashfs-root/dev
sudo chroot squashfs-root
mount -t proc none /proc
mount -t sysfs none /sys
mount -t devpts none /dev/pts
Once done with the system modifications, the chroot environment can be left, again:
umount /proc
umount /sys
umount /dev/pts
exit
umount squashfs-root/dev
All Desinfec’t internal and anti-virus data (e.g. signatures), are stored under /opt and /var/opt, so those need to be synced into the extracted squashfs folder:
sudo rsync -rlogtv /var/opt/ squashfs-root/var/opt/
sudo rsync -rlogtv /opt/ squashfs-root/opt/
Finally, the filesystem.squashfs needs to be recreated with the updated content and a new ISO image can be generated:
sudo chmod +w extract/casper/filesystem.manifest
sudo chroot squashfs-root dpkg-query -W --showformat='${Package} ${Version}\n' | sudo tee extract/casper/filesystem.manifest
sudo mksquashfs edit extract/casper/filesystem.squashfs -b 1048576
printf $(sudo du -sx --block-size=1 squashfs-root | cut -f1) | sudo tee extract/casper/filesystem.size
cd extract
sudo rm desinfect.md5.txt
find -type f -print0 | sudo xargs -0 md5sum | grep -v isolinux/boot.cat | sudo tee desinfect.md5.txt
sudo genisoimage -D -r -V "$IMAGE_NAME" -cache-inodes -J -l -b isolinux/isolinux.bin -c isolinux/boot.cat -no-emul-boot -boot-load-size 4 -boot-info-table -o ../desinfect_2020-09-14.iso .

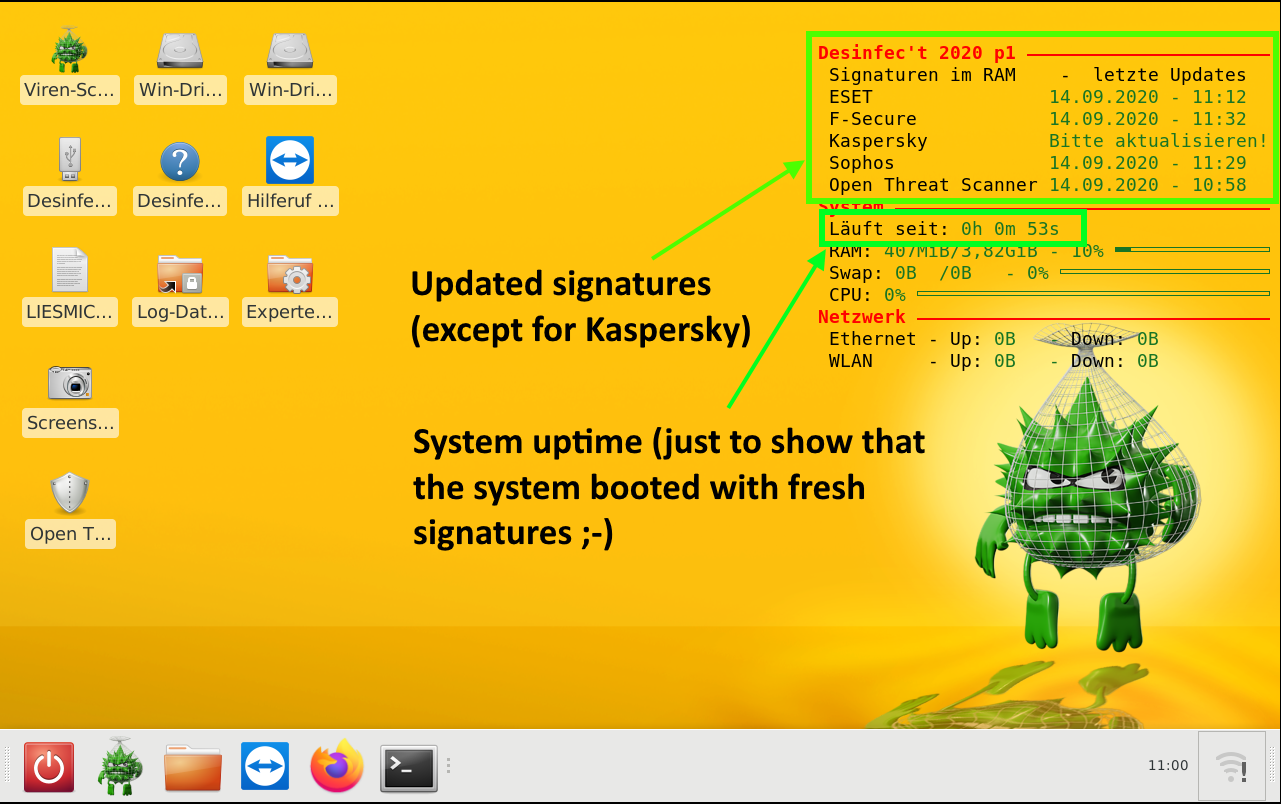
The final ISO can then be booted, and the scanner signatures will be “up-to-date” right from the start:

- Creating evil WiFi hotspots, network bridges and complex hybrids - 4. July 2022
- Write-up: Hack The Box – Rope Two - 17. January 2021
- Customizing Desinfec’t (and other Linux Live disks) - 29. September 2020